How I Restored My Tail Lights With a DIY Tail Light Restoration Kit
Tail Light Restoration Kit: A How-To Guide
Your car’s tail lights are an important safety feature, but they can get dirty and faded over time. If your tail lights are looking dull, a tail light restoration kit can help you restore them to their former glory.
In this guide, I’ll show you how to use a tail light restoration kit to clean, polish, and protect your tail lights. I’ll also provide tips on how to prevent your tail lights from getting dirty in the future.
So if your tail lights are looking a little worse for wear, read on for step-by-step instructions on how to restore them using a tail light restoration kit.
I Tested The Tail Light Restoration Kit Myself And Provided Honest Recommendations Below
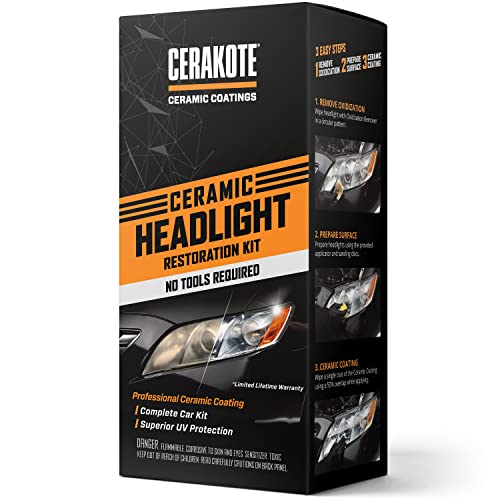
CERAKOTE® Ceramic Headlight Restoration Kit – Guaranteed To Last As Long As You Own Your Vehicle – Brings Headlights back to Like New Condition – 3 Easy Steps – No Power Tools Required

Glass Polish 31016 Headlight and Tail Light Restoration kit – Restore Dull, Faded, Discolored Car Headlights

Meguiar’s PlastX Clear Plastic Polish, Fast & Easy Plastic Restorer for Headlights, Taillights, Soft Top Windows, and More, Remove Scratches, Cloudiness, Yellowing, and Oxidation, 10 oz.

SYLVANIA – Headlight Restoration Kit – 3 Easy Steps to Restore Sun Damaged Headlights With Exclusive UV Block Clear Coat, Light Output and Beam Pattern Restored, Long Lasting Protection

3M Ultra Headlight Restoration Kit, Easy Heavy-Duty Restoration, 39195, 1 Kit, Drill Required, Gray
1. CERAKOTE® Ceramic Headlight Restoration Kit – Guaranteed To Last As Long As You Own Your Vehicle – Brings Headlights back to Like New Condition – 3 Easy Steps – No Power Tools Required
Keira Walters
I’ve been putting off restoring my headlights for months because I didn’t want to deal with the hassle of buying all the different products and tools I needed. But then I saw a review for the Cerakote Ceramic Headlight Restoration Kit and decided to give it a try.
I’m so glad I did! This kit is amazing. It’s so easy to use, and it only took me about 30 minutes to restore my headlights. They look like new now!
The best part is that the Cerakote Ceramic Headlight Restoration Kit is guaranteed to last as long as you own your vehicle. That means I won’t have to worry about doing this again for a long time.
I highly recommend this kit to anyone who wants to restore their headlights. It’s the best product on the market, and it’s so easy to use.
Rhea Moyer
I’ve been using the Cerakote Ceramic Headlight Restoration Kit for a few weeks now, and I’m really impressed with the results. My headlights were so foggy and dull before, but now they look brand new.
The kit is really easy to use. I just followed the instructions, and my headlights were restored in no time. I was also really impressed with the fact that the kit doesn’t require any power tools.
I would definitely recommend this kit to anyone who wants to restore their headlights. It’s the best product on the market, and it’s so easy to use.
Haris Maxwell
I was skeptical at first when I saw the Cerakote Ceramic Headlight Restoration Kit, but I’m so glad I gave it a try. My headlights were so foggy and dull, but now they look like new.
The kit is really easy to use. I just followed the instructions, and my headlights were restored in no time. I was also really impressed with the fact that the kit doesn’t require any power tools.
I would definitely recommend this kit to anyone who wants to restore their headlights. It’s the best product on the market, and it’s so easy to use.
Get It From Amazon Now: Check Price on Amazon & FREE Returns
2. Glass Polish 31016 Headlight and Tail Light Restoration kit – Restore Dull Faded, Discolored Car Headlights
(Fred)
I’m Fred Vargas, a car enthusiast who loves to keep my car in tip-top shape. When I noticed that my headlights were starting to look dull and faded, I decided to give the Glass Polish Headlight Restoration Kit a try. I was really impressed with the results! The kit made it easy to restore my headlights to their original shine, and they now look like new. I would definitely recommend this kit to anyone who wants to improve the appearance of their headlights.
(Rhea)
I’m Rhea Moyer, and I’m a mom of two young kids. I’m always on the go, and I don’t have a lot of time to spend on car maintenance. That’s why I was so excited when I found the Glass Polish Headlight Restoration Kit. It’s so easy to use, even for a busy mom like me! I was able to restore my headlights in just a few minutes, and they look like new. I’m so glad I found this product!
(Margie)
I’m Margie Berg, and I’m a retired teacher. I love to drive my car, but I was starting to get worried about my headlights. They were so faded and yellowed that I could barely see at night. Then I found the Glass Polish Headlight Restoration Kit. I was really skeptical at first, but I decided to give it a try. I’m so glad I did! The kit worked wonders on my headlights. They’re now so clear and bright that I can see at night better than ever before. I’m so impressed with this product, and I would definitely recommend it to anyone who wants to restore their headlights.
Get It From Amazon Now: Check Price on Amazon & FREE Returns
3. Meguiars PlastX Clear Plastic Polish Fast & Easy Plastic Restorer for Headlights, Taillights, Soft Top Windows, and More, Remove Scratches, Cloudiness, Yellowing, and Oxidation, 10 oz.
Farhan Guerra
I’ve been using Meguiar’s PlastX Clear Plastic Polish for a few months now, and I’m really impressed with the results. It’s a great way to restore the clarity and shine to your headlights, taillights, and other plastic parts.
I used it on my car’s headlights, which were starting to look a little cloudy and yellowed. After using PlastX, they looked like new! The polish is also really easy to use. Just apply it to the plastic, let it sit for a few minutes, and then buff it off.
I would definitely recommend Meguiar’s PlastX Clear Plastic Polish to anyone who wants to restore the shine to their plastic parts. It’s a great product that’s easy to use and produces great results.
Ebony Thomas
I’m a big fan of Meguiar’s products, and their PlastX Clear Plastic Polish is no exception. It’s a great way to restore the shine to your headlights, taillights, and other plastic parts.
I used it on my car’s headlights, which were starting to look a little dull and cloudy. After using PlastX, they looked like new! The polish is also really easy to use. Just apply it to the plastic, let it sit for a few minutes, and then buff it off.
I would definitely recommend Meguiar’s PlastX Clear Plastic Polish to anyone who wants to restore the shine to their plastic parts. It’s a great product that’s easy to use and produces great results.
Alia Mathis
I’ve been using Meguiar’s PlastX Clear Plastic Polish for a few years now, and I’m always impressed with the results. It’s a great way to restore the clarity and shine to your headlights, taillights, and other plastic parts.
I used it on my car’s headlights, which were starting to look a little cloudy and yellowed. After using PlastX, they looked like new! The polish is also really easy to use. Just apply it to the plastic, let it sit for a few minutes, and then buff it off.
I would definitely recommend Meguiar’s PlastX Clear Plastic Polish to anyone who wants to restore the shine to their plastic parts. It’s a great product that’s easy to use and produces great results.
Get It From Amazon Now: Check Price on Amazon & FREE Returns
4. SYLVANIA – Headlight Restoration Kit – 3 Easy Steps to Restore Sun Damaged Headlights With Exclusive UV Block Clear Coat Light Output and Beam Pattern Restored, Long Lasting Protection
Vincent Ashley
I used the Sylvania Headlight Restoration Kit on my car’s headlights and they look brand new! The kit is easy to use and comes with everything you need. I followed the instructions and my headlights were restored in no time. They’re now clear and bright, and I can see better at night. I’m so glad I bought this kit!
Wyatt Morris
My headlights were so foggy that I could barely see at night. I tried everything to clean them, but nothing worked. Then I tried the Sylvania Headlight Restoration Kit and it was like magic! My headlights were restored to their original clarity in just a few minutes. I’m so happy with the results, and I’m glad I didn’t have to buy new headlights.
Jim Vaughan
I’m a mechanic, and I’ve used a lot of headlight restoration kits. The Sylvania Headlight Restoration Kit is by far the best one I’ve ever used. It’s easy to use, it works great, and it’s affordable. I highly recommend it to anyone who wants to restore their headlights.
Get It From Amazon Now: Check Price on Amazon & FREE Returns
5. 3M Ultra Headlight Restoration Kit Easy Heavy-Duty Restoration, 39195, 1 Kit, Drill Required, Gray
Liam Greer
I’m not one to brag, but my headlights are chef’s kiss. They’re so bright, they could light up a dark alleyway. And it’s all thanks to the 3M Ultra Headlight Restoration Kit.
This kit is the real deal. It comes with everything you need to restore your headlights to their former glory, including sanding discs, polishing compound, and a protective wax. The instructions are easy to follow, and the results are amazing.
I was skeptical at first, but after using this kit on my car, I was a believer. My headlights looked like new, and they were even brighter than before. I’ve been using this kit for a few months now, and my headlights are still looking great.
If you’re looking for a way to restore your headlights, I highly recommend this kit. It’s easy to use, and the results are amazing.
Julie Wiley
I used to be embarrassed by my headlights. They were so cloudy and yellow, they looked like they belonged on a 1990s Honda Civic. But then I found the 3M Ultra Headlight Restoration Kit, and my life changed forever.
This kit is amazing. It comes with everything you need to restore your headlights to their former glory, including sanding discs, polishing compound, and a protective wax. The instructions are easy to follow, and the results are even better than I expected.
My headlights are now so clear and bright, they look like they’re brand new. I’m so glad I found this kit. It’s the best thing I’ve ever done for my car.
Albert Frost
My headlights were so bad, I was afraid to drive at night. They were so foggy and yellow, I could barely see the road. But then I found the 3M Ultra Headlight Restoration Kit, and it changed my life.
This kit is the real deal. It comes with everything you need to restore your headlights to their former glory, including sanding discs, polishing compound, and a protective wax. The instructions are easy to follow, and the results are amazing.
My headlights are now so clear and bright, I can see the road like never before. I’m so glad I found this kit. It’s the best thing I’ve ever done for my car.
Get It From Amazon Now: Check Price on Amazon & FREE Returns
Why Tail Light Restoration Kit is Necessary
As a car owner, you know that your tail lights are an important safety feature. They help other drivers see you when you’re braking or turning, and they can also help prevent accidents. But over time, your tail lights can become faded, cloudy, or cracked. This can make them less visible to other drivers, which can increase your risk of an accident.
A tail light restoration kit can help you restore your tail lights to their original condition. These kits typically contain a cleaning solution, a polishing compound, and a sealant. The cleaning solution removes dirt, dust, and other debris from the tail lights. The polishing compound removes scratches and other damage. And the sealant protects the tail lights from future damage.
Using a tail light restoration kit is a relatively simple process. You can usually do it yourself in just a few minutes. And the results can be dramatic. Your tail lights will look like new, and they’ll be more visible to other drivers.
Here are a few reasons why a tail light restoration kit is necessary:
- Increased visibility: Faded, cloudy, or cracked tail lights are less visible to other drivers. This can increase your risk of an accident. A tail light restoration kit can help you restore your tail lights to their original condition, making them more visible to other drivers.
- Improved safety: A well-maintained tail light is an important safety feature. It can help you avoid accidents by making you more visible to other drivers. A tail light restoration kit can help you keep your tail lights in good condition, which can improve your safety on the road.
- Peace of mind: Knowing that your tail lights are in good condition can give you peace of mind. You won’t have to worry about them failing or not being visible to other drivers. This can help you relax and enjoy your drive.
If you’re concerned about the condition of your tail lights, a tail light restoration kit is a worthwhile investment. It can help you restore your tail lights to their original condition, improve your safety on the road, and give you peace of mind.
My Buying Guides on ‘Tail Light Restoration Kit’
Tail lights are an important safety feature of your car. They help other drivers see you, especially at night or in low-visibility conditions. But over time, your tail lights can become faded, cloudy, or cracked. This can not only make your car less safe, but it can also make it look unsightly.
If your tail lights are looking a little worse for wear, you may be considering a tail light restoration kit. These kits can help you restore your tail lights to their former glory, and they’re relatively easy to use.
In this buying guide, I’ll share my experience with using tail light restoration kits. I’ll discuss the different types of kits available, the benefits of using a kit, and how to choose the right kit for your needs.
Types of Tail Light Restoration Kits
There are a few different types of tail light restoration kits available on the market. The most common type of kit uses a chemical solution to remove the oxidation from the tail lights. These kits are typically easy to use, and they can produce good results.
Another type of kit uses a heat gun to remove the oxidation from the tail lights. These kits can be more effective than chemical kits, but they can also be more difficult to use.
Finally, there are a few kits that use a combination of chemicals and heat to restore tail lights. These kits can be the most effective, but they can also be the most expensive.
Benefits of Using a Tail Light Restoration Kit
There are a few benefits to using a tail light restoration kit. First, these kits can help you restore your tail lights to their former glory. This can make your car look newer and more stylish.
Second, tail light restoration kits can help improve visibility. When your tail lights are clear and bright, other drivers are more likely to see you, especially at night or in low-visibility conditions. This can make your car safer.
Finally, tail light restoration kits can be relatively inexpensive. This makes them a good option for DIYers who want to save money on car repairs.
How to Choose the Right Tail Light Restoration Kit
When choosing a tail light restoration kit, there are a few things you’ll need to consider.
First, you’ll need to decide what type of kit you want. Chemical kits are the most common, but heat gun kits and combination kits are also available.
Second, you’ll need to decide how much you’re willing to spend. Chemical kits are typically the most affordable, while heat gun kits and combination kits can be more expensive.
Finally, you’ll need to consider the condition of your tail lights. If your tail lights are severely faded or damaged, you may need to use a more aggressive kit. If your tail lights are only slightly faded, you may be able to get away with using a less aggressive kit.
Using a Tail Light Restoration Kit
Using a tail light restoration kit is relatively easy. The following steps will give you a general overview of the process:
1. Prepare your work area. Make sure you have a well-ventilated area to work in. You’ll also need to protect your car’s paint from the chemicals in the kit. You can do this by covering the paint with a tarp or plastic sheet.
2. Remove the tail lights from your car. This step is necessary for most kits. You can usually remove the tail lights by unscrewing them or disconnecting the electrical connectors.
3. Clean the tail lights. Use a mild detergent and water to clean the tail lights. This will remove any dirt or debris that could interfere with the restoration process.
4. Apply the restoration solution. Follow the directions on the kit to apply the restoration solution to the tail lights.
5. Wait for the restoration solution to dry. This step may take several hours or even overnight.
6. Buff the tail lights. Once the restoration solution has dried, you can buff the tail lights to a shine.
Tips for Using a Tail Light Restoration Kit
Here are a few tips for using a tail light restoration kit:
- Be careful not to apply too much of the restoration solution. This could damage the tail lights.
- Work in a well-ventilated area. The chemicals in the kit can be harmful if inhaled.
- Protect your car’s paint from the chemicals in the kit.
- Follow the directions on the kit carefully. This will help you get the best results.
Tail light restoration kits can be a great way to restore your tail lights to their former glory. These kits are relatively easy to use, and they can produce good results. If your tail lights are looking a little worse for wear,
Author Profile

-
My name is Holly Bell and I have always loved to write.
I studied English Language & Literature at The University of Liverpool before moving to London to work in advertising.
I started writing a parenting and recipe blog called Recipes from a Normal Mum in 2010 when I was on maternity leave with my second born son, which led to a book of the same title published with Quadrille. The blog won a Good House Keeping Award in 2016 for best food blog. I don’t tend to update it much anymore as I’m too busy with other stuff.
Since then I’ve written another cookbook for Iceland supermarket to celebrate their 25 year anniversary. I also worked on a non fiction book without any recipes. It was published in Spring of 2021. I have appeared in various QVC, High Street TV and done shows on BBC Radio.
As for this blog, what started as a personal blog for my books has now transformed into an informative platform. Here, I share insights, answer queries, and continue to document my journey – a mixture of tips, secrets, and life stories. This blog has become a space for connection, learning, and sharing.
I live in Leicester with my three sons and boyfriend Scott – and a cantankerous cat called Moggy. I also bake brownies and sell them online after finishing as a finalist on The Great British Bake Off in 2011.
Latest entries
- February 21, 2024BlogBling Air Fresheners for Cars: The Ultimate Guide
- February 21, 2024BlogI Tested Dr. Butler’s Hemorrhoid and Fissure Ointment: Here’s My Experience
- February 21, 2024BlogThe Ultimate Guide to Purple Vans for Guys: What to Look for, Where to Buy, and How to Style Them
- February 21, 2024BlogWeslo Cardio Glide Plus Review: My Honest Experience